|
Step 1 - Start
with a Good Photo
Your
original photograph doesn't have to be perfect. If
it captures a scene or an expression that you love,
you're all set to go. If it needs some improvements,
you can tweak it with the help of a free online
photo editor.
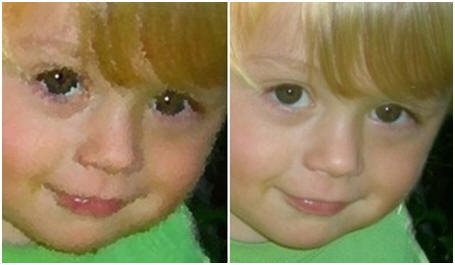
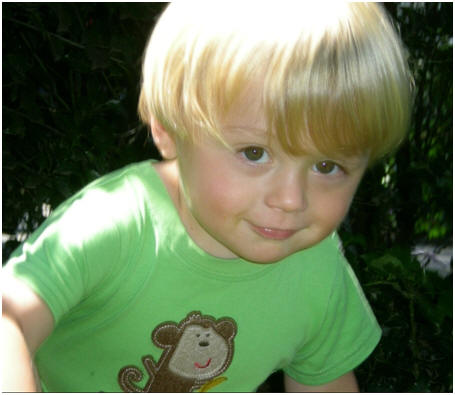
I
uploaded this shot of my grandson CJ to the Aviary
photo editor at FreeOnlinePhotoEditor.com. Using their easy free
tools, I cropped the shot, enhanced it with their
preset button, and increased the sharpness and color
saturation a bit.
Those
last steps brought out a little rash under CJ's
nose. I used the blemish tool to get rid of that.
Then, I used the focus tool to fade out everything
but CJ's face.
The
little bits of bright areas in the background bushes
were distracting, so I brushed them out with with
the drawing tool.
After
that, it was just a matter of saving the enhanced
photo and downloading it to my computer, with a new
name, so that it didn't replace the original shot.
Click to learn how easy it is
to edit and enhance any of your photos at
FreeOnlinePhotoEditor.com
Of
course, if your original photo is perfect, you can
skip this first step entirely.
Step 2 - Add Oil
Painting Effects
Picture2Life.com is a free, web-based photo editor that
offers special effects that you can apply to any of
your digital photos.
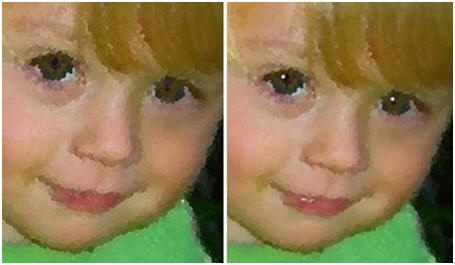
I
uploaded the enhanced photo and chose the "Fun
Stuff" selection on Picture2Life. Scrolling down, I
found and clicked on the "Oil Paint" tool. Then,
using the #3 brush size, I applied the effect four
or five times. Each time that I applied the oil
paint effect, the photo looked more and more like a
painting.
You'll
have to experiment a bit with your photo. Try
different brush sizes and apply the oil paint effect
any number of times. Don't worry about ruining your
project. Picture2Life's "Undo" arrow can take you
back as many steps as you like.
You can
save and download your creation whenever you want. I
was happy with how CJs photo looked, above, so I
stopped and saved it.
Click
here to learn how to use Picture2Life's free online
photo effects editor
Step 3 - Touch Up
The Photo Painting
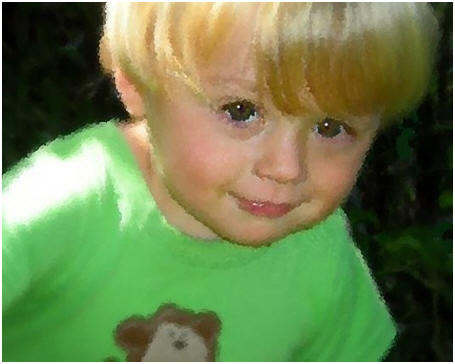
So, my
new "painting" looked pretty good, but it wasn't
perfect. The oil paint effect blurred the details
enough that the sparkle in CJ's eyes was lost.
Fortunately, replacing it was an easy fix. I
uploaded the photo painting back to
FreeOnlinePhotoEditor.com and
used their drawing tool to add small spots of light
on CJ's eyes and lower lip. I used their eraser tool
to smudge the spots a bit to make them look
painted-on. As before, I saved it and downloaded it
to my computer.
Look
carefully at your photo painting. Compare it to your
original shot. A few quick touch-ups can go a long
way to making a great finished picture.
Step 4 -
Print and Frame Your Masterpiece
All
right, it's not a Van Gogh. But, I made a
nice-enough picture, from a point-and-shoot
snapshot, in well less than an hour and with no
messy paint and brushes to clean up. CJ's grandma
liked it enough to ask for another one of CJ's
little-brother. How many repeat customers did Van
Gogh get?
I
printed the final photo painting with my HP
Photosmart on matte photo paper from Staples and it
came out well. Then, I tried Fredrix Desktop Inkjet
Canvas from the art store and it came out even
better. That was after I experimented a bit and
intensified the colors on the printer's controls.
You'll
have to experiment when you print your photo
painting too. Every printer is different.
A
store-bought mat or frame will add the finishing
touch.
Best of
luck with yours. Let me know how it comes out.
Don
Berg,
Today's Plans,
don@todaysplans.net
|